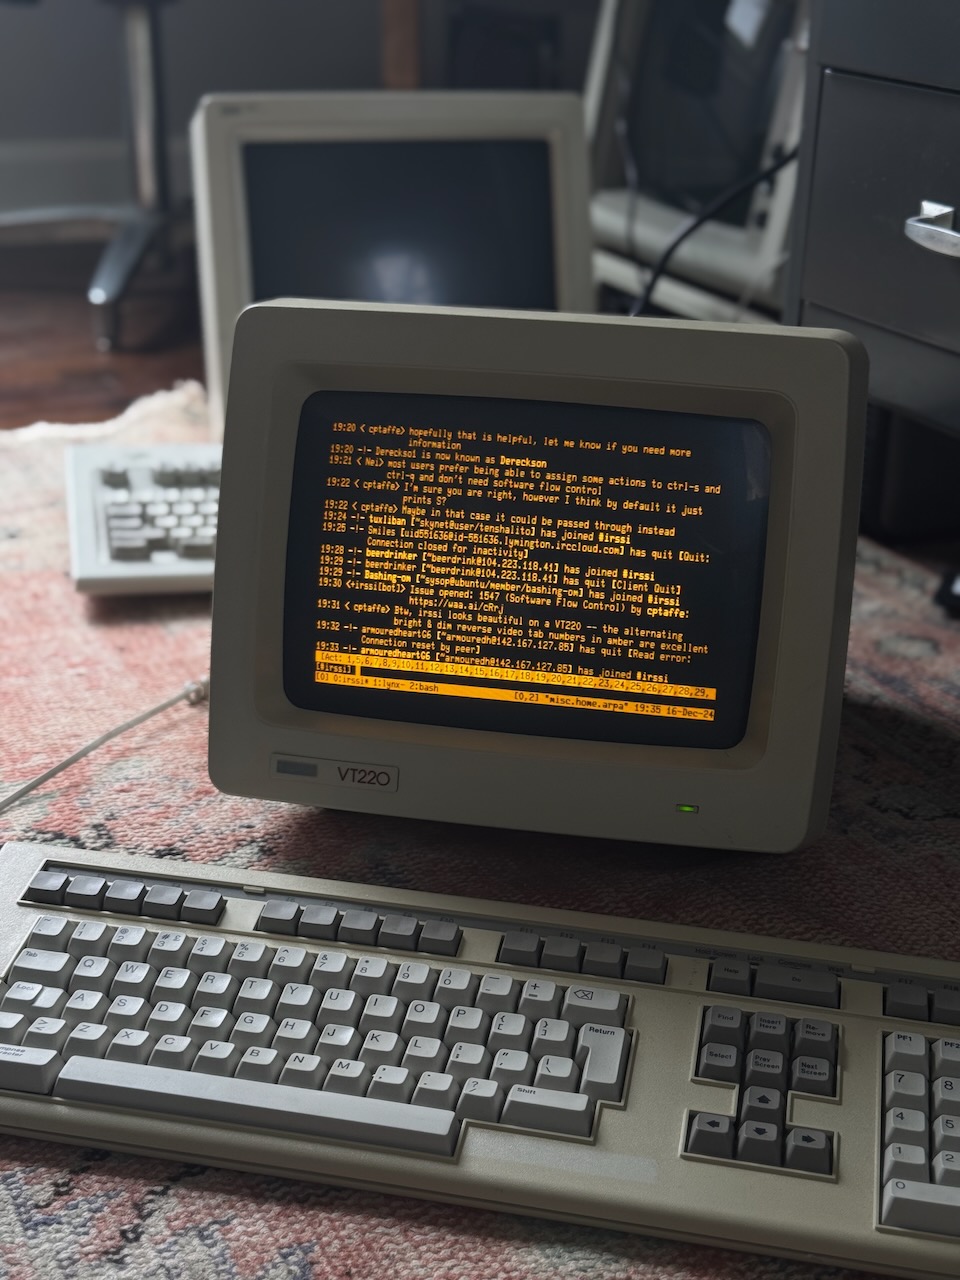
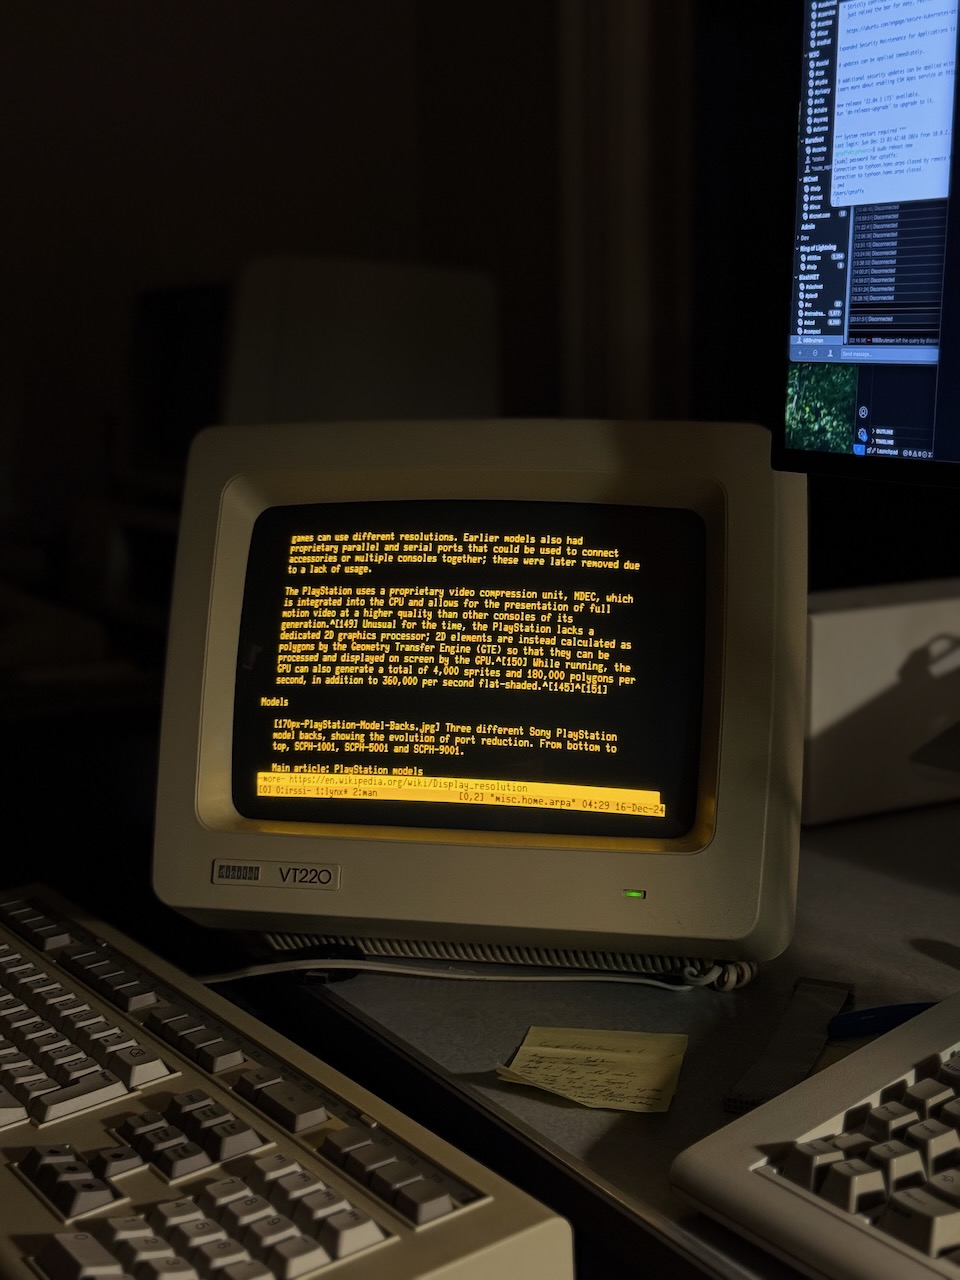
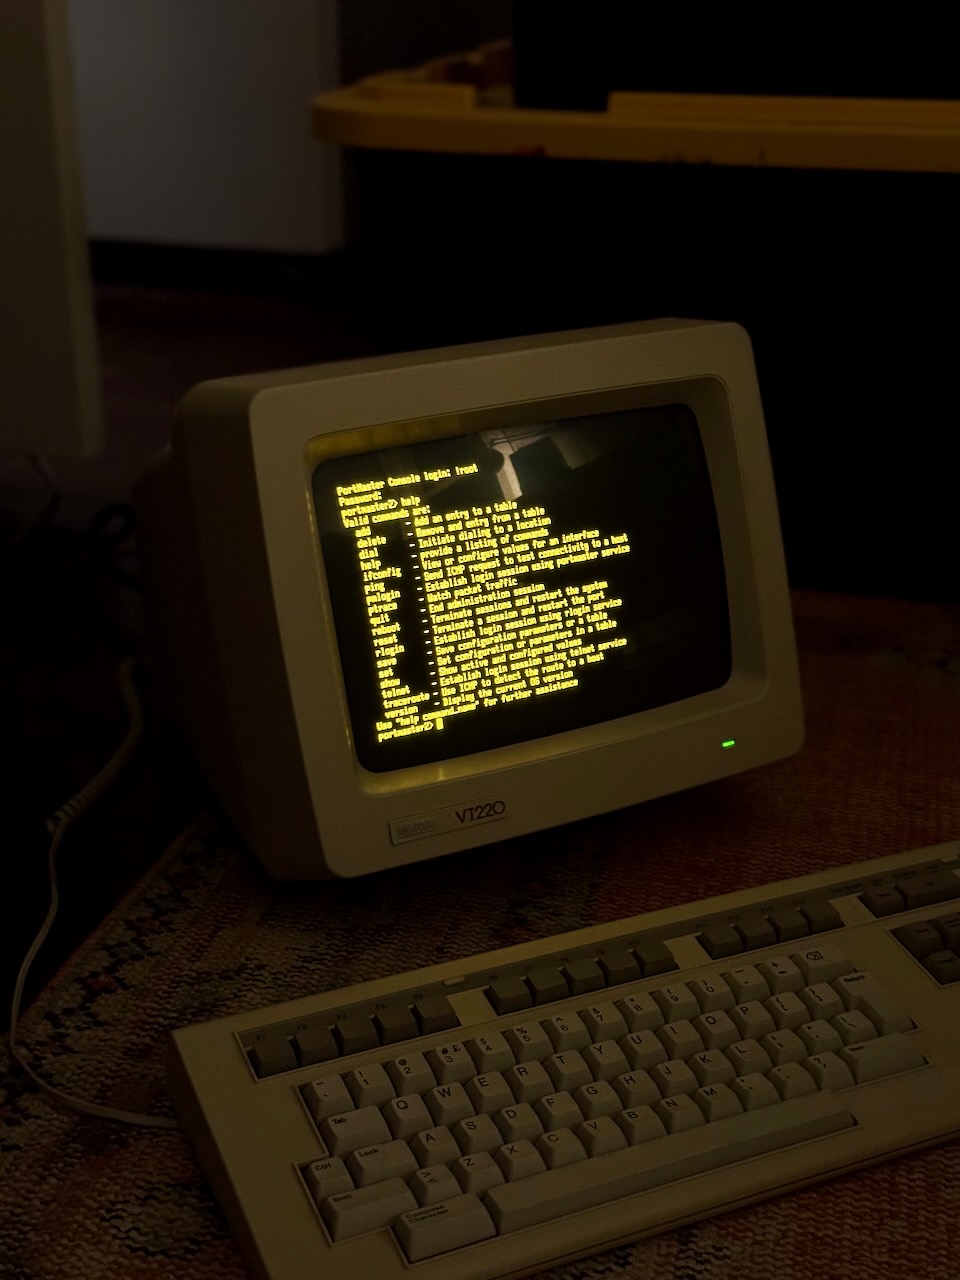
A few years ago, I stumbled upon a DEC VT220 on Facebook Marketplace labeled "old monitor." Of course I messaged the seller immediately and drove the half hour to meet at a Starbucks. I'd set it up before on a modern macOS system, but had issues with corrupt characters on scroll and placed it on a shelf. While testing an IBM 3151, I dusted it off and realized it's actually fully functional!

To connect the VT220 to your system, you'll need a USB to serial adapter like the TRIPP-LITE Keyspan (USA-19HS), a null modem cable or null modem adapter, a DB9 to DB25 adapter, and possibly a DB9 or DB25 gender changer -- keep in mind both the Keyspan and the VT220 are male connectors.
As of writing, the TRIPP-LITE Keyspan (USA-19HS) drivers for macOS are not yet available for Sequoia, and previous driver versions fail to install with an error about the kernel extension signature. Fortunately, this USB serial adapter has been manufactured long enough that there's a driver for OS X 10.4, the version running on my iBook available from this Keyspan Driver Archive -- I chose Model USA-49WG Keyspan Driver 2.5 - Mac OSX 10.2.8 - 10.4.x and was able to connect my adapter and see it under /dev/tty.KeySerial1.
MacBook
On modern macOS, the adapter is available only via a longer adapter-specific name and as both a tty and cu variant, of which we'd use cu. See Setting up a Serial Console in Mac OS X for details setting up a launchd service for getty as /Library/LaunchDaemons/vt220.plist:
<?xml version="1.0" encoding="UTF-8"?>
<!DOCTYPE plist PUBLIC "-//Apple//DTD PLIST 1.0//EN" "http://www.apple.com/DTDs/PropertyList-1.0.dtd">
<plist version="1.0">
<dict>
        <key>Label</key>
        <string>vt220</string>
        <key>ProgramArguments</key>
        <array>
                <string>/usr/libexec/getty</string>
                <string>vt220</string>
                <string>cu.serial-100014371</string>
        </array>
        <key>KeepAlive</key>
        <true/>
</dict>
</plist>
The first argument to getty tells it the type of the terminal, defined in /etc/gettytab, and the second is the Keyspan device name as found under /dev. The gettytab entry is as follows (see man gettytab), note al is optional and defines a user to automatically login:
vt220:\
        :np:im=\r\n:sp#19200:al=cptaffe:tt=vt220:
iBook
On OS X 10.4, we still have a functional /etc/ttys file (see man ttys), so we can add a new entry for our serial adapter:
# name         getty                      type  status    comments
tty.KeySerial1 "/usr/libexec/getty vt220" vt220 on secure # VT220 via USB serial adapter
This instructs getty to use the serial port adapter as a serial console, with a type of vt220 found in /etc/gettytab. We could also use the std.19200 type here. This profile expects a console at 19200 baud, so we need to configure our VT220 as such. It also sets the vt220 terminal type ($TERM) so that the system understands how to interact with it. For more information see man getty. The /etc/gettytab entry is the same as above, see man gettytab for details:
vt220:\
        :np:sp#19200:al=cptaffe:tt=vt220:
The options have the following meanings, for undocumented FreeBSD options we use the OpenBSD man gettytab.
| Option | Description |
|---|---|
np |
Terminal uses no parity (i.e., 8-bit characters) |
im |
Initial (banner) message |
sp |
Line speed (input and output) |
al |
User to auto-login instead of prompting |
tt |
Terminal type (for environment, e.g. $TERM) |
Updating /etc/ttys requires a reboot, sudo kill -HUP 1 was unsuccessful for me.
VT220
The VT220 must have a keyboard to operate, and it's a very particular keyboard which communicates over serial protocol to the terminal1. To open the Set-Up Directory with the LK201, press F3. To select an item use arrow keys and the Enter key from the numpad (not Return).
Under the Display section, I have:
- Interpret Controls
- No Auto Wrap
- Jump Scroll
- Light Text, Dark Screen
- Cursor
- Block Style Cursor
Under the General section, I have:
- VT200 Mode, 7 Bit Controls
- User Defined Keys Locked
- User Features Unlocked
- Multinational
- Numeric Keypad
- Normal Cursor Keys
- No New Line
With TERM=vt220, the 7-bit controls are expected. Some systems like OS X have a definition for vt220-8bit, seen in the output of the toe command. VT200 mode supports more keys than VT100 mode. OS X does not function correctly with the No New Line setting, but toggling to New Line leads to duplicate prompt lines -- Linux (e.g. via telnet) works well with No New Line.
Under the Communications section, I have:
- Transmit=19200
- Receive=19200
- No XOFF
- 8 Bits, No Parity
- 1 Stop Bit
- No Local Echo
- EIA Port, Modem Control
- Disconnect, 2s Delay
- Limited Transit
Toggling EIA Port, Modem Control instead of EIA Port, Data Leads Only lead to a much smoother experience with paging data such as man pages because it enables hardware flow control. Without hardware flow control, the VT220 will sometimes struggle to handle the flow of incoming characters -- especially if Smooth Scroll is enabled. Additionally, when modem controls are enabled XOFF is no longer necessary, which solves issues with beeping within man and issues with irssi2. The getty config std.19200 expects both a speed of 19200 and 8N1: 8-bit, no parity, 1 stop bit.
Usage
Once logged into the iBook from the VT220, I telnet (to bypass unsupported SSH algorithms) to a Linux VM which serves as a console server on my local network, and tmux attach to a shared tmux session where I run irssi for use by my IBM PC XT or other telnet clients.
From my macOS machine with iTerm, I ssh into the same machine and run tmux attach -CC which opens a native iTerm window for each tmux window. Now, when I select any tmux window, the VT220 (and any other clients) will refresh and display that window. The main advantage is that with the VT220 on my desk, I can use it an interface for IRC, vim, etc. while using a comfortable, clicky IBM Model M keyboard instead of the notably subpar membranes on the LK201.
See Integrating a VT220 into my OS X workflow for another more elegant keyboardless solution (and the More Information section for a plethora of useful links).
Apps
Most command-line programs and visual applications work well on a VT220, including irssi for IRC chats, vim for editing, tmux for terminal multiplexing, and lynx for navigating text-based websites. Joel Buckley writes about using mutt for email on a VT510. A monochrome display means that any applications which depend on colored output won't work well, and some application themes may not map well to monochrome; however the amber glow is what gives the terminal its beauty.

Terminal Mux
A USB serial adapter is great until you need to move your laptop, and a dedicated PC likely only has a single serial port. What if you want to run multiple terminals at once? Enter the terminal multiplexer: a networked appliance with a number of serial ports.
Terminal multiplexers like the DEC MUXserver could serve hundreds of terminals, or modems, over a single Ethernet connection3. In the age of the ubiquitous publicly switched telephone network, modems were the way to connect remotely -- to workers homes or to satellite offices. And with the advent of dial-up Internet, ISPs procured these same appliances, such as the Livingston (later Lucent) Portmaster series4, to provide dial-up service using a fleet of serial-attached modems.

I acquired a Livingston Portmaster 2 for a dial-up project on my home telephone network. To use it as a terminal server, we need a null modem adapter and DB25 cable. For longer connections, the DB25 to RJ45 adapters with configurable pin-out are popular. Once attached, the default connection is 9600 baud 8N1 on s0. The Portmaster 2 doesn't support DHCP, so it must be configured with a static IP address and netmask like so:
ComOS - Livingston PortMaster

login: !root
Password:
portmaster2> ifconfig
ether0: flags=16<IP_UP,IPX_DOWN,BROADCAST>
        inet 10.0.3.16 netmask ffff0000 broadcast 10.0.0.0 mtu 1500
portmaster2> set ether0 address 10.0.3.16
Local (ether0) address changed from 10.0.3.16 to 10.0.3.16
portmaster2> set ether0 netmask 255.255.0.0
ether0 netmask changed from 255.255.0.0 to 255.255.0.0
portmaster2> set gateway 10.0.0.1
Gateway changed from 16.3.0.10.in-addr.arpa to 10.0.0.1, metric = 1
portmaster2> set nameserver 10.0.0.1
Name Server changed from 192.168.1.1 to 10.0.0.1
portmaster2> set domain home.arpa
Domain changed from heavy.computer to home.arpa
portmaster2> save all
...
Note that by default the gateway was the reverse lookup for the address. Out of curiosity I tested this on my local network with dig -t PTR 16.3.0.10.in-addr.arpa and found that it would fail because there was no server with authority for 10.in-addr.arpa -- however nslookup would work. The solution, if using pfSense, is to add the following to Custom options under Services > DNS Resolver:
local-zone: "10.in-addr.arpa" transparent
See the Configuration Guide for more information. Once configured, I registered it on my local DNS as portmaster2.home.arpa where it is reachable over telnet for remote administration. My terminal is now connected to the second serial port, s1, because s0 is a special diagnostic port which cannot be configured (controlled by DIP switch):
portmaster2> show s1
----------------------- Current Status - Port S1 ---------------------------
        Status: USERNAME
         Input: 0                        Parity Errors: 0
        Output: 11                      Framing Errors: 0
       Pending: 0                       Overrun Errors: 0
  Modem Status: DCD-  CTS+

                Active Configuration    Default Configuration
                --------------------    ---------------------
     Port Type: Login                   Login
    Baud Rates: 9600                    9600,9600,9600
        Parity: none                    none
 Modem Control: off                     off

 Terminal Type: vt220
We can change settings, like enabling hardware flow control, modem control, and increasing the speed:
portmaster2> set s1 rts/cts on
RTS/CTS flow control for port S1 changed from off to on
portmaster2> set s1 speed 19200
Speed for port S1 (1) changed from 9600 to 19200
portmaster2> reset s1
Resetting port S1
We can set up the port to automatically connect to a remote host with TERM=vt220:
portmaster2> set s1 service_login telnet
Login service for port S1 changed from portmaster to telnet
portmaster2> set s1 host misc.home.arpa
Host changed from 192.168.1.1 to misc.home.arpa for S1
portmaster2> set s2 termtype vt220
Terminal Type for port S2 changed from  to vt220
Now, connecting a terminal automatically connects us to the VM at misc.home.arpa over telnet!
Hardware Flow Control
The Portmaster doesn't support DTR/DSR, see the PortMaster Configuration Guide page 6-19:
Note - The PortMaster ignores DSR. Some PCs may require DSR high, but do not tie DSR to DTR.
which the VT220 depends on:
in modem control modes, transmits data only when RTS, CTS, DSR, and DTR are on.
A workaround is to loop DTR to DSR, so that we can enable modem control on the VT220 and utilize hardware flow control with RTS/CTS. Even with only software flow control enabled, the VT220 performs flawlessly.
RJ-45 Adapters
To easily extend the distance between the Portmaster and the terminals, we can use DB-25 to RJ-45 adapters and existing Cat5+ cabling. The Portmaster is a DTE device, so a rolled cable or null modem adapter is used to connect to another DTE device, such as the terminal.
The PortMaster Configuration Guide contains the following table:
| Pin | Description | Direction |
|---|---|---|
| 2 | Transmit Data (TXD) | Output |
| 3 | Receive Data (RCD) | Input |
| 4 | Request to Send (RTS) | Output |
| 5 | Clear to Send (CTS) | Input |
| 6 | Data Set Ready (DSR) | Input |
| 7 | Signal Ground | |
| 8 | Data Carrier Detect (DCD) | Input |
| 20 | Data Terminal Ready (DTR) | Output |
A null-modem cable is used to connect a terminal (DTE) to a console port. A null-modem cable crosses pins 2 and 3, and 4 and 5, pin 7 is straight-through, and pins 6 and 8 are connected to pin 20.
This is the standard null-modem translation found in adapters such as the L-com DMA074MF:
| Pin | Pin | Description | Description |
|---|---|---|---|
| 2 | 3 | Transmit Data (TXD) | Receive Data (RCD) |
| 3 | 2 | Receive Data (RCD) | Transmit Data (TXD) |
| 4 | 5 | Request to Send (RTS) | Clear to Send (CTS) |
| 5 | 4 | Clear to Send (CTS) | Request to Send (RTS) |
| 6 | 20 | Data Set Ready (DSR) | Data Terminal Ready (DTR) |
| 7 | 7 | Signal Ground | Signal Ground |
| 8 | 20 | Data Carrier Detect (DCD) | Data Terminal Ready (DTR) |
| 20 | 6 | Data Terminal Ready (DTR) | Data Set Ready (DSR) |
| 20 | 8 | Data Terminal Ready (DTR) | Data Carrier Detect (DCD) |
To create a Cisco style RJ-45 adapter identical to CAB-500DTF5 (see the Serial Cable Connection Guide and Cabling Guide for RJ-45 Console and AUX Ports), we can use this mapping:
| RJ-45 | DB-25 | Description |
|---|---|---|
| 1 | 4 | Request to Send (RTS) |
| 2 | 20 | Data Terminal Ready (DTR) |
| 3 | 2 | Transmit Data (TXD) |
| 4 | 7 | Signal Ground |
| 5 | 7 | Signal Ground |
| 6 | 3 | Receive Data (RCD) |
| 7 | 6 | Data Set Ready (DSR) |
| 8 | 5 | Clear to Send (CTS) |
DB-25 pin 8, Data Carrier Detect (DCD), is only used on modems (DCE) and irrelevant for DTE devices.
Dial in
Now that we've experimented with direct serial connections, we can introduce a modem and dial in over telephone! The simplest option is to connect a modem to our Livingston Portmaster 2, connect another modem to our VT220, and connect both to a home telephone network. What could be simpler? Enter, the Lucent Portmaster 3.
At the core of the publicly switched telephone system was a synchronous digital network transmitting sampled PCM audio, this T-carrier system began with T1 which could support 24 telephone lines over a single twisted pair (1.5 mbit/s). Enterprises could purchase T1 or T3 (672 channels at 44.736 mbit/s) from AT&T for phone lines and later data via ISDN. The last modems supported 56k speed downlinks, which utilized every available bit of the digital transmission (T-carrier used a bit-robbing system for status in the last bit of each 8-bit sample of the 8khz stream), and this is what the Lucent Portmaster 3 supports. It has two T1 line connections for up to 48 lines of 56k modem service -- no need for a separate modem rack.
My home phone system utilizes a Digium TE410 card to provide four T1 lines, two to an Adit 600 with FXS cards for individual POTS (subscriber) lines, and two to the Portmaster 3 for 56k modems. We can attach the VT220 to a physical Hayes modem over serial, connect it to a POTS line, and dial into the Lucent Portmaster 3.
To be continued...
Links
Other resources I found along the way:
- Integrating a VT220 into my life
- Justin's VT220 setup
- IBM 3151 Reset Procedure
- VT220 Owner's Manual, VT220 Technical Manual
- FreeBSD Handbook, Chapter 29: Serial Communications
- How to Subnet a Class C Network with Livingston Portmasters
-
The LK201 keyboard communicates at 4800 baud using 8N1 over an EIA (Electronic Industries Association) RS-423 interface. The four conductors of the RJ11 connector (commonly used by telephones) are right-to-left data out, power, ground, and data in. Note that the serial protocol only denotes how the data is represented on the wire, not the pin-out which is specified by the D-subminiature specifications for e.g. DE-9 and DB-25. The RS-422 port used by the Macintosh and Apple IIGS differs in that each pin has a dedicated return line to avoid a common ground, because these ports can be connected over long distances with LocalTalk.
- A DEC LK201 Emulator by Peter Bjorn (archived)
- NetBSD LK201 Documentation by Dan McMahill
- LK201 Keyboard by Paul Williams
-
If
XOFFis enabled, note thatirssiblocks^S, so when in settings or during initialtmux attach, the VT220 will spamSto the output in an attempt to sendXOFF. Thetmux attachmay actually never succeed ifirssiis the active window when attaching.I've opened issue #1547 after discussing it with the maintainer on IRC. ↩︎
-
See the MUXserver 320 Hardware Installation Guide for details on how the MUXserver 320 could be synchronously linked to MUXserver 300s, each of which could connect to up to 32 terminals. ↩︎
-
See Joshua Stein's post on How Dial-Up ISPs Worked; he does some incredible work on vintage Apples, for instance the Wallops IRC client for System 6+ -- find him on Libera
#cyberpals. For an example of how to run something like this at home, see Den's Dial-up Project. ↩︎ -
The Cisco adapter for DCE devices, e.g. CAB-500DCM, has the following pinout:
↩︎RJ-45 DB-25 Color Description 1 5 Blue Clear to Send (CTS) 2 8 Orange Data Carrier Detect (DCD) 3 3 Black Receive Data (RCD) 4 7 Red Signal Ground 5 7 Green Signal Ground 6 2 Yellow Transmit Data (TXD) 7 20 Brown Data Terminal Ready (DTR) 8 4 White Request to Send (RTS)