I recently stumbled upon a boxed Hauppauge WinTV-HVR-1600 PCI TV Tuner card at Goodwill, and wondered if I could use it broadcast live TV over my network. I installed it into an available PCI slot on an old Dell Optiplex 755, and attached an antenna.

We can see the card is recognized over PCI:
; lspci | grep video
03:00.0 Multimedia video controller: Conexant Systems, Inc. CX23418 Single-Chip MPEG-2 Encoder with Integrated Analog Video/Broadcast Audio Decoder
We can then see the cx18 driver for that chip loaded on boot:
; sudo dmesg | grep -i CX23418
[   24.373431] cx18-0: cx23418 revision 01010000 (B)
[   24.623610] tveeprom: audio processor is CX23418 (idx 38)
[   24.623612] tveeprom: decoder processor is CX23418 (idx 31)
[   26.275958] cx18-0: loaded v4l-cx23418-cpu.fw firmware (158332 bytes)
[   26.482992] cx18-0: loaded v4l-cx23418-apu.fw firmware V00120000 (141200 bytes)
[   27.601932] cx18-0 843: loaded v4l-cx23418-dig.fw firmware (16382 bytes)
[   27.621767] cx18-0 843: verified load of v4l-cx23418-dig.fw firmware (16382 bytes)
To test scanning available channels, install w-scan2 on Ubuntu via the PPA:
; sudo add-apt-repository ppa:w-scan2/stable
; sudo apt update
; sudo apt install w-scan2
Then do a scan, in this case outputting a channel list in VLC playlist format:
; sudo w_scan2 -c US -L > chans.xspf
TVHeadEnd
Tvheadend is an open source TV streaming and recording service. To install tvheadend on Ubuntu, follow the Linux Install Documentation, which amounts to running:
curl -1sLf 'https://dl.cloudsmith.io/public/tvheadend/tvheadend/setup.deb.sh' | sudo -E bash
Inspect the script to ensure it hasn't been tampered with. It adds the tvheadend/tvheadend repository at /etc/apt/sources.list.d/tvheadend-tvheadend.list, installs their GPG signing key, and ensures some dpkg components like apt-transport-https are installed.
Then install tvheadend:
sudo apt install tvheadend
You will be prompted for a superuser username and password for the web interface. The tvheadend service is started by default:
systemctl status tvheadend.service
To see the full logs:
journalctl -u tvheadend.service
Which reminds us of the port tvheadend is listening on:
Jan 15 01:10:52 typhoon systemd[1]: Started tvheadend.service - Tvheadend - a TV streaming server and DVR.
Jan 15 01:10:52 typhoon tvheadend[14972]: config: Using configuration from '/var/lib/tvheadend'
Jan 15 01:10:52 typhoon tvheadend[14972]: http: Starting HTTP server 0.0.0.0:9981
Jan 15 01:10:52 typhoon tvheadend[14972]: htsp: Starting HTSP server 0.0.0.0:9982
To allow apps which don't support our self-signed CA which we'll use with a reverse proxy below, we need to enable listening on 0.0.0.0, and add a firewall rule. Define a new application profile in /etc/ufw/applications.d/tvheadend:
[Tvheadend]
title=Tvheadend TV streaming server
description=Tvheadend is the leading TV streaming server for Linux.
# HTTP, HTSP
ports=9981,9982/tcp
Then enable the rule:
; sudo ufw app update tvheadend
; sudo ufw allow tvheadend
Rule added
Rule added (v6)
Now, the mDNS record generated by the Avahi integration for autodiscovery will match the available ports. Apps like TvhClient on iOS can auto-discover the server using this record. Ideally we would load the self-signed certificate onto the iOS device, then modify the Avahi configuration to reflect the reverse proxied ports 80 and 443 with _http._tcp and _https._tcp. I'm not certain how to handle the HTSP port.
Continue through the wizard's setup process, associate your card (mine is detected as a Samsung S5H1409 QAM/8VSB) with an ATSC-T network, then associate that network with the us-ATSC-center-frequencies-8VSB mux. Once the setup is complete, a scan will commence which takes several minutes. I don't have cable, so the ATSC-C (cable) network is not useful.
From the UI, under the Configuration tab, you can see the relevant objects:
- Under DVB Inputs, TV adapters: the Linux
/dev/dvb/adapter0device and the Samsung S5H1409 frontends for ATSC-T (terrestrial) and ATSC-C (cable). - Under DVB Inputs, Networks: the ATSC-T and ATSC-C networks which each adapter is associated with.
- Under DVB Inputs, Muxes: a list of frequencies, each associated with a network.
- Under DVB Inputs, Services: a list of channels with their number and name, each associated with a mux. For each mux with a successful scan, there will be an associated service. The Map Services operation will create a channel for each service.
- Under Channel / EPG, Channels: a list of channels, each associated with a service. These are the channels which you will see in your Tvheadend clients.
- Under Channel / EPG, EPG Grabber Modules: the list of Electronic Program Guide grabber modules. The Guide is constructed from either over-the-air EPG information from the default EIT module, or from service such as XMLTV using the xmltv commands.
The files under /var/lib/tvheadend/ represent each of these objects.
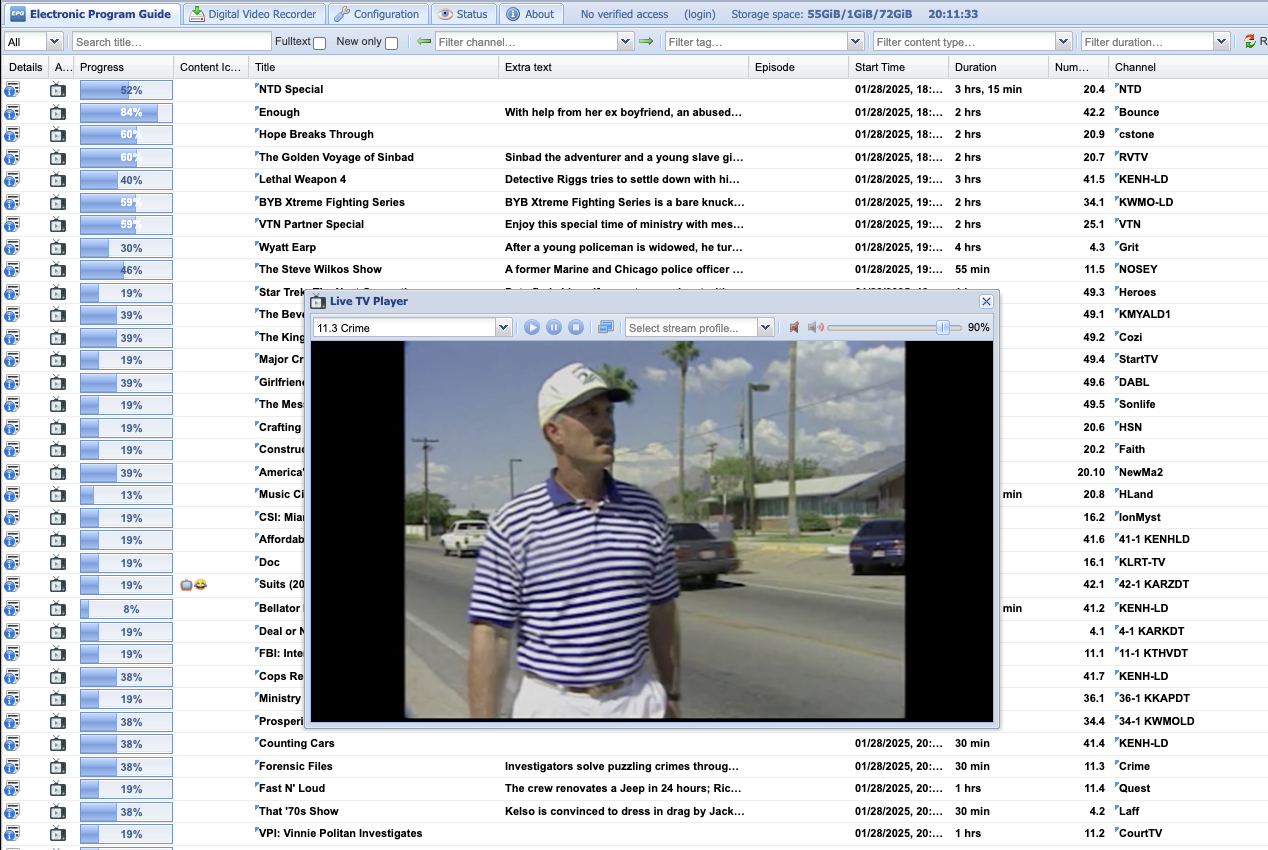
The Web UI uses a transcoding profile, webtv-h264-aac-matroska, to transform the raw stream from the tuner into a stream playable in the browser. This extra processing lead to stuttering and audio issues. Using a client like TvhClient on iOS which uses VLC to process the raw stream on-device provides the best experience.
Unfortunately, Tvheadend no longer supports analog channels, which limits our card's utility to ATSC-T instead of NTSC (for instance, from a VCR) or FM radio.
IPTV
Tvheadend supports MPEG-TS encoded over-the-network streams, however guide (EPG) information must be provided by another source, e.g. XMLTV. See an example of some of these channels at tv.garden. Some IPTV channels are documented at iptv-org/iptv, available as m3u files. Each m3u file contains URLs which point to yet more m3u or m3u8 (UTF-8) files, this continues recursively until a file contains a sequence of .ts (MPEG-TS) files. Tvheadend supports some of these streams by default, but can support more with the help of ffmpeg using pipe:// URIs:
The /var/lib/tvheadend/ffmpeg-wrapper-m3u.sh script to rewrite m3u files:
#!/usr/bin/env bash
set -euo pipefail

curl -sSL "$1" | awk '/^#/ { print; next } { print "pipe:///var/lib/tvheadend/ffmpeg-wrapper.sh", $0 }'
And the /var/lib/tvheadend/ffmpeg-wrapper.sh script which re-encodes MPEG-TS streams:
#!/usr/bin/env bash
set -euo pipefail

ffmpeg -loglevel fatal -i $1 -vcodec copy -acodec copy -f mpegts pipe:1
To add channels like these to Tvheadend:
- Under Configuration, DVB Inputs, Networks, choose Add and then select IPTV Automatic Network. Name the network, e.g.
iptv-org/pbs, toggle Enabled and Create Bouquet, set the maximum number of input streams to 20 to prevent over-loading the system with scans (or uncheck scan after creation), in the URL field placepipe:///var/lib/tvheadend/ffmpeg-wrapper-m3u.shfollowed by a space and the URL of yourm3ufile, for example the raw link to the Githubus_pbs.m3ufile,https://raw.githubusercontent.com/iptv-org/iptv/refs/heads/master/streams/us_pbs.m3u. - The system will pipe the
m3ufile through ourffmpeg-wrapper-m3u.shscript, which will rewrite eachm3u8URL entry with apipe:///var/lib/tvheadend/ffmpeg-wrapper.shURI to reformat the stream. Then, the system scans each channel and determines if it contains a broadcast. If it does, a mux and a corresponding service are created. Under Configuration, DVB Inputs, Services select Map Services to create channels from each service.
Now, these additional IPTV channels will be available as channels in clients, but without guide information.
Broadcastify
As an example, using ffmpeg we can add audio-only MPEG-A streams to Tvheadend. On broadcastify.com, you can locate these streams once playing in your browser's network tab. They are in the form, https://broadcastify.cdnstream1.com/{id}, where {id} is the feed number.
- Under Configuration, DVB Inputs, Networks, choose Add then select IPTV. Name the network, e.g. IPTV Manual Network, toggle Enabled. This network can be reused for any manually added IPTV streams in future.
- Navigate to the Muxes tab, choose Add. For Network select our newly created IPTV Manual Network, then set EPG Scan to Disabled since this channel has no EPG information. Under URL place
pipe:///var/lib/tvheadend/ffmpeg-wrapper.sh https://broadcastify.cdnstream1.com/{id}replacing{id}with your feed id. Set the Mux and Service name with the name of the feed. Click Create. - The new Mux should be automatically scanned. On your server, you should see this scan under
journalctl -fu tvheadend.service. - Navigate to Services, you should find a new channel with the name set in step two. Choose Map Services, then Map Selected Services, then locate your service. Click Map Services.
- Under Configuration, Channel / EPG, Channels, you should see your new service as a channel.
On your client, you'll now see the new channel using the service name set in step two. Playing the channel will stream the MPEG-A stream through ffmpeg to create an MPEG-TS steam for Tvheadend.
Reverse Proxy
For my purposes, I want the HTTP interface to listen on localhost and to proxy to it from nginx listening on the HTTP standard port 80. That way, I can assign dvr.home.arpa to this machine and have that host route to the tvheadend web interface. To do that, we can edit $OPTIONS used by the systemd service at /etc/default/tvheadend and add the --bindaddr option specified in man tvheadend to look as below:
OPTIONS="-u hts -g video --bindaddr 127.0.0.1"
Then edit the config at /var/lib/tvheadend/config, gleaning some documentation from config.c. Enabling proxy allows for X-Forwarded-For support.
        "proxy": true,
        "cors_origin": "https://dvr.home.arpa",
Now we can restart tvheadend:
sudo systemctl restart tvheadend.service
Reverse Proxy
To serve HTTPS on 443 via nginx, we need certificates. I use cfssl as described in my post on PKI, after adding servers/typhoon/typhoon.home.arpa.json and adding the expected cert and key files as make targets, we simply run make to construct the certs and back them up.
Remember to add the intermediate and root certificates to form the full chain:
cat servers/typhoon/typhoon.home.arpa-server.pem intermediate-ca.pem ca.pem > servers/typhoon/typhoon.home.arpa-server-chain.pem
; scp servers/typhoon/typhoon.home.arpa-server{-chain,-key}.pem typhoon.home.arpa:.
typhoon.home.arpa-server-key.pem                                                                                          100% 1679   490.6KB/s   00:00
typhoon.home.arpa-server-chain.pem
Then on typhoon (our desktop we are installing tvheadened on):
sudo mv typhoon.home.arpa-server-chain.pem /etc/ssl/certs/typhoon.home.arpa-server.pem
sudo chown root:root /etc/ssl/certs/typhoon.home.arpa-server.pem
sudo chmod 777 /etc/ssl/certs/typhoon.home.arpa-server.pem
sudo chmod 644 /etc/ssl/certs/typhoon.home.arpa-server.pem
sudo mv typhoon.home.arpa-server-key.pem /etc/ssl/private/
sudo chown root:ssl-cert /etc/ssl/private/typhoon.home.arpa-server-key.pem
sudo chmod 640 /etc/ssl/private/typhoon.home.arpa-server-key.pem
Now we can install nginx:
sudo apt install nginx
The nginx config at /etc/nginx/conf.d/dvr.conf looks like:
server {
    listen       80;
    listen       [::]:80;
    server_name  dvr.home.arpa;
    root         /usr/share/nginx/html;

    return 301 https://$host$request_uri;
}

# Settings for a TLS enabled server.
server {
    listen       443 ssl http2;
    listen       [::]:443 ssl http2;
    server_name  dvr.home.arpa;
    root         /usr/share/nginx/html;

    ssl_certificate "/etc/ssl/certs/typhoon.home.arpa-server.pem";
    ssl_certificate_key "/etc/ssl/private/typhoon.home.arpa-server-key.pem";
    ssl_session_cache shared:SSL:1m;
    ssl_session_timeout  10m;

    location / {
        proxy_pass http://127.0.0.1:9981/;
        proxy_set_header X-Real-IP $remote_addr;
        proxy_set_header X-Forward-For $proxy_add_x_forwarded_for;
        proxy_http_version 1.1;
        proxy_set_header Upgrade $http_upgrade;
        proxy_set_header Connection "Upgrade";
    }

    error_page 404 /404.html;
    location = /404.html {
    }

    error_page 500 502 503 504 /50x.html;
    location = /50x.html {
    }
}
The Upgrade and Connection headers are required to enable proxying websockets.
And it passes testing:
; sudo nginx -t
nginx: the configuration file /etc/nginx/nginx.conf syntax is ok
nginx: configuration file /etc/nginx/nginx.conf test is successful
Now we can enable nginx:
sudo systemctl enable nginx.service --now
And we can allow HTTP and HTTPS traffic through the ufw firewall:
; sudo ufw allow https
Rule added
Rule added (v6)
; sudo ufw allow http
Rule added
Rule added (v6)
After adding a host override in pfSense to point dvr.home.arpa at the IP statically assigned through DHCP to our desktop, we can navigate to dvr.home.arpa.